10 Tips for Scanning Old Photos

Thanks to the wonders of modern scanning technology, you can digitize those dusty old memories (and do some fun things with them, too!).
©iStockphoto.com/arenacreative

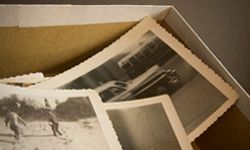
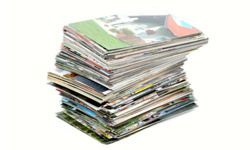
Your parents' 50th anniversary is coming up and you've figured out the perfect gift -- a slideshow of their wedding photos and other pictures of them throughout the years, all set to their favorite songs. The only hitch is that you've got to transfer stacks of faded photos from decades' worth of dust-covered boxes and photo albums to your computer. Then you've got to clean up the scratches and blemishes to somehow make those photos look presentable.

Where do you start? You could outsource the project to a company that will scan and correct your pictures and then return them to you, perfectly digitized on a DVD. But these services aren't cheap: You can pay 39 cents or more for each photo [source: DigMyPics].

Advertisement

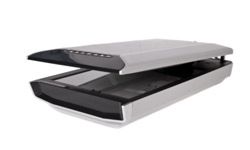
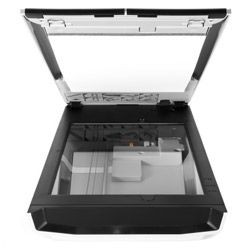
Or you can buy a scanner and do it yourself. After all, you don't need to be a photo-restoration expert to pull this off. The newest generation of inexpensive scanners and photo editing software makes it easy for anyone to scan and correct old photos.

So dust off those pictures, fire up your scanner and get ready to breathe new life into your old photos with these ten scanning tips.

10: Get the Right Scanner

The flatbed scanner: A novice photo digitizer's best friend.
Hemera/Thinkstock

A scanner is essential if you want to transfer your beloved photographs from your cluttered attic to your cluttered desktop.

Scanners all work in essentially the same way -- they convert photos into a digital format. Unless you're putting together an NBC special or a museum retrospective, you don't need to buy the most expensive, top-of-the-line scanner. Your family members probably won't notice the difference between a 1200-dpi image and one that's 6400 dpi (dots per inch, a measure of image resolution).

Advertisement

The most common type of scanner is a flatbed. You put the picture face down on a glass surface and a scanning head moves across the photo, capturing the image, which is then sent to your computer. There are other types as well: A film scanner works with slides and negatives. A wand scanner is a small, handheld device that you move across the photo yourself.

if you're just looking to scan photos, a flatbed is probably your best bet for maximum image quality. You can get a fast, high-quality flatbed scanner for less than $100. If scanning isn't in your daily repertoire, get an all-in-one machine that also faxes, copies and prints so you can get your money's worth.

9: Sort Your Photos

Unless you have a lot of time on your hands, you'll have to carefully choose the photos you'd like to scan.
©iStockphoto.com/saw

Unless you intend to spend days watching your scanner chug away at your huge stack of old photos and you want to fill up your entire hard drive, consider paring things down a bit. That old, yellowing shot of your great-great-step-grandfather golfing is a memory, to be sure, but is it a memory you really need to preserve on your PC?

Skip any photos that are damaged beyond repair. Time can leave its mark on photos, and not everything in those old albums may be salvageable. If you can still find the original negatives of your photos, use them instead of prints because they don't tend to fade and damage as quickly.

Advertisement

Don't try to fix your photos before you scan them; attempts to scrub them clean will only make the damage worse. Just wipe off the dust with a soft brush. You can clean up all the scratches and other blemishes in a photo editing program. Don't cut your photos, either. You can crop them digitally once they're scanned.

8: Check Your Settings

Scanners have lots of nifty settings.
Jupiterimages/Pixland/Thinkstock

Simply slapping your picture on the glass and pressing "go" isn't going to make your precious photos shine. It's important that you experiment with your settings to see how adjusting contrast, brightness and sharpening will affect the overall look of your pictures.

Most scanners come with automatic settings, which are a nice shortcut. These settings allow the picture to be scanned at the highest resolution. Of course, the highest resolution might not be necessary, so customizing the settings becomes more important. You'll want a smaller file size (and thus lower resolution) for images that are going online or are e-mailed. If your goal is just to preserve your photos, a minimum of 300 dpi should be fine. You can get away with as little as 200 dpi if you're just going to post the images on the Web or e-mail them. If your final picture is going to be bigger than the original or you need a higher resolution to create a more professional looking product, go for 600 or higher dpi.

Advertisement

Choose your color. If the photo is in black and white, you can either scan it in grayscale or color. The color scan option will give you a greater ability to manipulate the image. You can change it back to grayscale once it's been scanned. If it's sepia-toned, scan it in color. Oftentimes, you can also find specific document types in scanners that will choose appropriate settings for the image type. Newspaper pictures or articles, illustrations and even negatives have presets in certain scanners.

Don't forget to use the "preview" or "prescan" function after you're done adjusting. This is an invaluable tool for doing a final pass of what the document looks like before you hit go.

7: Scan Away

Don't be shy -- get your scan on!
iStockphoto/Thinkstock

Now that you've got your scanner set and your photos ready, the next logical step is to do the actual scanning. Before you start, clean off the platen -- the glass scanning bed where you'll put the photos -- by wiping it down with a little bit of glass cleaner sprayed on a cloth. Clean the platen again from time to time as you're scanning those old, dusty photos (we'll talk more about why scanner upkeep is so important in a later tip).

Place the image face down on the glass. As we mentioned, you can hit the "prescan" or "preview" button to check that your photo is clean and positioned correctly before you scan it for real. After you've scanned a photo, save it as a TIFF or JPEG file. A TIFF is higher quality image, but a JPEG will make it easier to e-mail the photos. When you save, don't compress the photo too much. You'll sacrifice image quality for file size, and it will look like mush.

Advertisement

One cool function of scanners these days is that you can scan directly to your e-mail account (or anyone else's, for that matter). Avoiding the hassle of finding your image in some random folder, this allows you to simply type in an email address and receive an e-mail with the attached image. Another tip for scanning old photos is just a click away.

6: Save Time With Batching

While we doubt you'll be able to scan this many pictures at once, scanning in batches will save you tons of time.
Hemera/Thinkstock

Depending on what kind of scanner you're working with -- and how new the computer or its programs are -- you might find yourself taking days to scan the boxes of pictures from your 1994 trip to Yellowstone. Instead of spending weeks resenting yourself for choosing to take a picture of every single wildflower and elk you saw, scan several photos at a time.

After scanning a few pictures at a time (feel free to cram in as many as will fit on the glass), you'll be left with one big, collage-type image. Simply crop out each picture manually, saving it as its own file. But remember: You certainly don't have to edit each picture as you go. By scanning plate after plate and then editing, you'll get all the pictures in quickly and then break apart individual photos or edit pictures on a need-to basis.

Advertisement

So you've worked your way through piles of pictures when you suddenly spot that gigantic, panoramic photo of you with the touring cast of "Cats." How can you scan the oversize photo for posterity? Read on to discover the tricks for keeping your memories (and "Memory") alive.

5: Scan the Big Picture

That panorama's not so, well, panoramic when you're trying to scan it on a regular-size scanner bed.
iStockphoto/Thinkstock

Whether it's a picture of you surrounded by the cast of "Cats" or a breathtaking vista of dusk over the Grand Tetons, oversized photos are a terrific way to capture massive memories. But what to do when you can only capture the grandeur of the mountains or the excitement of seeing humans dressed as tabby cats in a small-scale scan?

Here's one solution: Scan several different sections of one large image and then stitch together the pictures for an impressive poster-sized presentation. When scanning a large picture, make sure to have about 30 percent overlap from one placement to the next. If the photo or image is really large, you might find it helpful to tape the sides so it stays in place. After scanning all the sections, use an image-editing program (like Adobe Photoshop or Windows Live Photo Gallery) to manually make each individual picture flow seamlessly into one image.

Advertisement

Speaking of editing programs, half the fun of scanning old photos is enhancing, repairing or retouching them. Let's scan ourselves to the next page to find out some handy tips for making old photos look like new.

4: Clean up Your Photos

Once you're done scanning, it's time to fix those photos on your computer.
Sri Maiava Rusden/Getty Images

Now it's time to clean up those photos. A lot of different programs can help you do this. For about $30, you can get a basic program like Microsoft Digital Image or Photo Explosion, which will do simple touch-ups. If you're more ambitious or artistic, you can invest upwards of $600 for a more sophisticated image editor like Adobe Photoshop.

To focus in on the main action in the photos, you can cut out the edges using the Crop tool. Then you can enhance your photos by adjusting the hue, saturation, and contrast manually, or, if you don't know much about photo fixing, clean up your images with the program's automatic settings, like Auto Levels (Photoshop), Instant Fix (PhotoDeluxe) or Enhance (iPhoto).

Advertisement

To clean up the blemishes in your photos, use the "clone stamp" tool. It picks up details from elsewhere in the picture and lets you use those similar colors and textures to cover creases, tears, and other damage.

Some imperfections have less to do with the original photographs than the equipment you're using. Take a look at the next page to see how regular upkeep can leave you more time scanning and less time obsessing over small imperfections that your scanner has left behind.

3: Clean Your Scanner

Scanner glass can get mighty dirty, what with dust and fingerprints, so keep it clean.
Thomas Northcut/Getty Images/Thinkstock

So you scan your glowing, flawless picture of the sunset over a Thai beach, only to notice a line in the digital image right where your beach hammock comes into view. An overlooked flaw in your photo? Don't panic yet; you can have a startlingly clear and vivid photo of the most beautiful picture in the world, but your perfect image will come to naught if you have a scratched, dusty scanner.

It seems obvious, but do remember that your scanner needs upkeep. Clean the glass regularly by using a damp washcloth with mild soap, and avoid scratches by keeping the documents you scan clean and free of dust themselves. Be aware that using cleaning fluids that contain ammonia or isopropyl alcohol can leave streaks. Many manufacturers will also have detailed instructions online about how to clean the internal mechanisms of scanners, which can be useful if jams occur often.

Advertisement

2: Organize Your Scanned Photos

Give your newly digitized photos a happy, well-organized home on your computer.
Hemera/Thinkstock

Now that you've transferred your pile of old photographs to a folder on your desktop, what do you do with them?

First, come up with an organizational system that you can remember. Your parents' beautiful wedding photos aren't going to do you any good if you can't find them a year from now. Set aside a folder (or folders, depending on how many pictures you have) to store your pictures. Tag the pictures with names you'll recognize (like "Mom's wedding dress, 1969") so you can easily find pictures when you need them.

Advertisement

Once you're organized, here are a few more ideas of what to do with those old photos:

  • E-mail photos to friends and family.
  • Edit the pictures together into a slideshow set to music for an anniversary, wedding or other special occasion.
  • Use an online picture sharing site like Shutterfly or Snapfish to make nifty gifts, like calendars, mugs, holiday cards, mouse pads and digital photobooks.
  • Print the pictures out on photo paper and frame them.

1: Upload to Edit and Store

More like "Free-casa."
Screenshot by HowStuffWorks.com

Not all of us have fancy equipment to make our faces flawless and straighten our teeth. But once your picture is scanned, you might realize that your old elementary photos could use a bit of brightening or touching up that you don't have the program for.

Luckily, there are several Web-based programs that allow you to edit your pictures online after uploading them. Picasa is Google's free, Web-based photo sharing site that allows you to not only share and organize photos but also to edit them. Picnik.com also allows you to edit online through Flickr.com, but it will be moving its services to Google+ in April 2012.

While these sites offer a Web-based version of the master image, you'll also want to back up the images in more than one place. Along with the original images on your hard drive, store copies of the photos on DVDs or an external drive.

Now that your old photos are safely scanned, edited, stored and uploaded, check out lots more information about photography technology.

Lots More Information

  • Fulton, Wayne. "A few scanning tips." Scantips.com. 2010. (Jan. 12, 2012) http://www.scantips.com/.
  • Hewlett-Packard. "Get quick tips for scanning photos." 2011. (Jan. 12, 2012) http://www.hp.com/united states/consumer/digital_photography/organize_archive_photos/tips/10_tips_scanning.html.
  • Hewlett-Packard. "HP Scanjet Scanners: Cleaning and Maintaining the Scanner." 2012. (Jan. 12, 2012) http://h20000.www2.hp.com/bizsupport/TechSupport/Document.jsp?objectID=bps02788
  • Johnson, Dave. "Cleaning up scanned photos." PC World. Nov. 18, 2003. (Jan. 12, 2012) http://www.pcworld.com/article/113123/digital_focus_clean_up_scanned_images.html
  • Johnson, Dave. "Convert your old photos to digital pictures." Microsoft. 2010. (Jan. 12, 2012) http://windows.microsoft.com/en-US/windows-vista/Convert-your-old-photos-to-digital-pictures-Using-a-scanner-to-archive-your-memories-digitally.
  • Johnson, Dave. "Digital Focus: Scanning Old Photos." PC World. Feb. 28, 2006. (Dec. 14, 2010) http://www.pcworld.com/article/124718/digital_focus_scanning_old_photos.html.
  • Johnson, Dave. "Digital Focus: The ABCs of Scanning Old Photos." PC World. (Dec. 14, 2010) http://www.pcworld.com/article/117441/digital_focus_the_abcs_of_scanning_old_photos.html.
  • Jones, Frederic H. Digital Photography: Just the Steps for Dummies. Hoboken, NJ: Wiley Publishing, Inc., 2005.
  • Picasa. "Edit Photos." 2011. (Jan. 12, 2012) http://support.google.com/picasa/bin/answer.py?hl=en&answer=156342
  • Rose, Carla. Digital Memories: Scrapbooking with Your Computer. Que Publishing, 2004.
  • Saltzman, Marc. "Scanning Your Family History." Microsoft.com. (Dec. 14, 2010) http://www.microsoft.com/windowsxp/using/digitalphotography/learnmore/scanning.mspx.
  • Story, Derrick. "New life for old photos." Macworld.com. May 1, 2006. (December 14, 2010) http://www.macworld.com/article/50580/2006/05/newlife.html.

Advertisement

Loading...