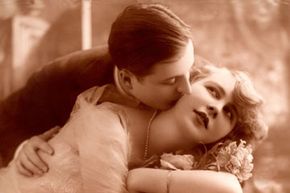
Color toning of photographic images has been around for a long time. In the 1890s and early 1900s, a new school of art called Tonalism developed in England and the United States; painters of this movement created indistinct imagery, used muted colors and tended toward a somber, melancholy tone. Photographers of the same period, such as Alfred Stieglitz and Edward Steichen, tried to evoke the same feeling in their prints.
In those days, photographers used chemical baths to print their images, and they used dyes, called chemical toners, to alter the coloring of their photographs. Preparations like Berg's Brown/Copper Toning Solution and Kodak Poly-Toner could produce a range of brown, sepia and even metallic coppery tones, depending on how they were applied. They altered the chemical emulsion that coated the photographic paper and contained the image, rather than the paper itself [source: Blaker].
Sepia toning is a great tool for photographers. It can enhance the beauty of period architecture photos and rustic natural panoramas, for example. Portraits of people whose faces are worn with lines and wrinkles are also good candidates for sepia toning. If you still work with conventional film and develop your own pictures in a chemical darkroom, working with sepia images is a skill you should definitely learn. Not only does it give you more options artistically, but a sepia photographic print will actually retain its range of tones better as it ages than an unaltered print [source: Frost].
If you stick with digital photography, giving photographs a sepia tone is a lot simpler and doesn't require messy, expensive chemicals. All that's needed is a sophisticated photo-editing program like Photoshop, and a little knowledge and creativity. On the next page, we'll explain how you can create your own sepia-toned photos, either in a conventional darkroom or on a computer.

