Digital Photography Basics

If you're contemplating the change from film to digital and aren't sure if it's for you, check out this article to learn the basics of digital photography. See more pictures of cool camera stuff.
Image courtesy HowStuffWorks Shopper

Digital photography has many advantages over traditional film photography. Digital photos are convenient, allow you to see the results instantly, don't require the costs of film and developing, and are suitable for software editing and uploading to the Internet.

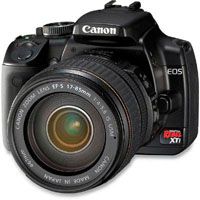
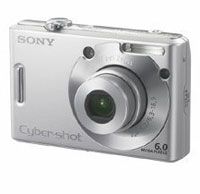
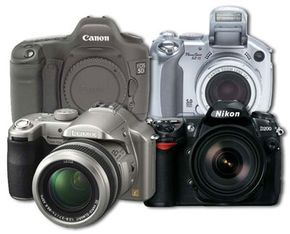
While shooting on film will always have a place in the world of photography, digital models have taken over the consumer camera market almost completely. Just five years ago, buying a digital camera that could take photos of the same visual quality as a film camera could cost more than $1,000. But prices have dropped tremendously, and camera quality has increased. Today cameras in the $500 range are near-professional quality, and all but the cheapest digital cameras produce decent looking images.

Advertisement

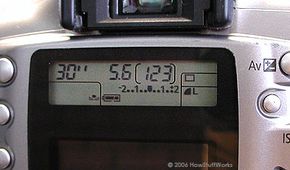
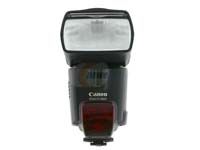
There are also many additional features available on digital cameras, including image stabilization, on-board image editing, color correction functions, auto-bracketing and burst modes. A lot of these can be handled by image editing software, and so they can be unnecessary (and often inferior) when built into a camera. Burst mode, macro mode and image stabilization are probably the most useful extra features, but the best way to find out which camera is best for you is to explore any of the numerous digital photography magazines and Web sites that offer comparisons and user reviews of hundreds of different cameras.

If you own or are planning to buy a digital camera, this article will take you beyond point-and-shoot and help you get more out of it. See the next page to get started.

Advertisement

Megapixel Ratings

­At five megapixels, image quality is close to that of film.

The basic attribute of a digital camera that determines image quality is its megapixel rating. This number refers to the amount of information that the camera sensor can capture in a single photograph. Cameras with high megapixel ratings take larger pictures with more detail. Those photos will also look better when printed, especially in bigger sizes.

At five megapixels, image quality gets in the neighborhood of film. If you're willing to spend about $100 on a digital camera, then it's difficult to find a model that doesn't have five megapixels. These cameras are fine for most people who just want to take a few family snapshots or capture vacation memories. The more you spend, the more megapixels you get. In the $400 to $600 range, you can expect to find cameras with anywhere from eight to 12 megapixels. If you plan to take serious artistic photos, sell prints of your photos, or post large, high-resolution photos on the Internet, this is the range for you. If you think you need a more powerful camera than that, you probably don't need to be reading this article.

Advertisement

Next, learn about digital camera settings. 

Digital Camera Settings and Modes

With a decent digital camera and a bit of practice, anyone can take acceptable quality photos with the camera set on full automatic. You can even take a bunch of so-so pictures and make them look acceptable later with image editing. But to really wring every ounce of ability out of your camera and produce truly beautiful photographs, you'll need to learn a few things about the manual settings. Keep in mind that lower-end cameras might not have manually adjustable settings.

When you're changing the settings on a camera, you're trying to find the proper exposure for the subject and lighting conditions. Exposure is the amount of light hitting the camera's sensor when you take a photo. Generally, you will want the exposure set so that the image captured by the camera's sensor closely matches what you see with your eyes. The camera tries to accomplish this when it's on full automatic mode, but the camera is easily fooled and a little slow, which is why manual settings usually produce better pictures.

Advertisement

As you get more familiar with your camera, you can play with different exposures for different effects. There are times when auto is better - something happens suddenly and you only have a few seconds to get your photo. Just flip to auto and take a picture. Getting the shot with a slightly incorrect white balance and poor field depth is better than standing there fiddling with f-stop settings while Bigfoot strolls back into the forest.

To adjust exposure, you can tweak two different settings: aperture and shutter speed. Aperture is the diameter of the lens opening - a wider aperture means more light gets through. Aperture is measured in f-stops. Higher f-stop numbers mean a smaller aperture. The aperture setting also affects depth of field, the amount of the photograph that is in focus. Smaller apertures (higher f-stops) give longer depth of field. A person in the foreground and the cars 20 feet behind her could all be in focus with a small enough aperture. A larger aperture results in a shallow depth of field, which you normally use for close-up shots and portraits.  On the next page, we'll take a closer look at shutter speed.

Advertisement

Shutter Speed

Our digital camera set at its slowest shutter speed -- 30 seconds.

Shutter speed is the amount of time the shutter remains open to allow light through it. An extremely fast shutter speed is 1/2000 of a second, while camera settings usually allow up to about one second, which is very slow. One-sixtieth of a second is about as slow a shutter speed as you can use when taking a hand-held shot, and not get any blur. Some photographers force their camera shutters to stay open for much longer to create various special effects. Leaving a camera pointed at the night sky with the shutter open for several hours results in a photo of the paths the stars seem to take across the sky as the Earth rotates.

Practice and experience are the best ways to figure out which combinations of aperture and shutter speed are best for different kinds of photos. While a slow shutter speed lets in more light, it also makes it very difficult to get a crisp picture. Any movement at all (of either the subject or the camera) will result in blurring. Sometimes you might want this effect, but for a clear photo of a moving object, you need a fast shutter speed.

Advertisement

­

Many cameras have a semi-automatic mode that can be set to either aperture priority or shutter priority. You can either set the aperture or shutter speed (depending on which priority mode is enabled) to the desired setting, and the camera calculates the right settings to accommodate the lighting conditions. The camera might also have a variety of modes to choose from, such as sports mode or outdoor mode. These are aperture/shutter speed presets. Again, experience will let you know what conditions are right for each mode.

Advertisement

How to Take Good Photos

An external flash unit
Image courtesy HowStuffWorks Shopper

Taking photos with a digital camera follows many of the same techniques that make for successful film photographs. However, digital cameras differ in a few important ways.

There's usually a lag between the moment you press the shutter release button and when the camera takes the picture (except for the most expensive models). A longer lag time means that it's more difficult to capture a moment. Here are a few ways to minimize this problem:

Advertisement

  • Set your focus ahead of time. When using auto focus, pressing the shutter release halfway tells the camera to focus in on your target. You might have to wait for a few seconds with that button halfway down, but when you finally take the picture, the camera won't have to waste time focusing.
  • Use manual exposure settings. It takes time for the camera to calculate exposure settings in full automatic mode, so set them manually whenever you can.
  • Don't use flash unless it's absolutely necessary. The time it takes to charge the flash can create additional lag. If you need a flash, consider using an external flash unit.
  • Use the viewfinder instead of the LCD screen. This will save your batteries and reduce the amount of work the camera has to do.
  • Reduce image quality. Digital cameras allow you to adjust the size and resolution of the photos you are taking. Huge, uncompressed tiff files will look great, but they might create lag. If you are trying to capture action shots, try a lower quality setting with smaller images. Obviously you're sacrificing large, high-resolution images, but it will increase your chance of getting the shot you wanted. Experiment with your camera's settings to find the right balance between image quality and shutter lag.
  • Use burst mode. If your camera offers it, burst mode is a great way to get the precise moment you're shooting for by taking a series of quick photos over the course of a few seconds. Depending on the camera, burst mode (or continuous mode) may require a compromise in image quality.

Learn more on how to shoot the best photos by accounting for the problems on the next page.

Advertisement

Digital Camera Problems

The viewfinder on our camera is through-the-lens, so we shouldn't have a problem with parallax.

Another problem with digital cameras is that they tend to need more light than a film camera to create a comparable exposure. As a result, slower shutter speeds are often used to get enough light. This can make it very difficult to take a photo without some blurring. The solution is simple: use a tripod. They're not very expensive, and you can mount almost all cameras to one. This step will result in a huge improvement in photo quality. If you have to take a photo with a slow shutter speed and you don't have your tripod handy, try using burst mode. It will take practice to hold the camera steady (hold it against your face and exhale as you press the button), but the burst will give you a better chance at getting one unblurred picture out of the bunch. When all else fails, a sturdy shelf or stack of books can help.

When in doubt, go for a greater depth of field. With digital images, it is always possible to use software to take certain areas of a photo out of focus, but you can never "fix" anything that's out of focus to begin with.

Advertisement

If your camera has a viewfinder in the upper left corner, you may have problems with parallax, especially for close-up shots. This means that the viewfinder is looking at a slightly different area than what the lens is seeing. Cameras with a through-the-lens viewfinder don't have this problem. Using the LCD screen to line up your shot can help, but the screens still don't usually show all of what the lens is seeing, and they can make it difficult to focus properly. ­

Image Editing Software

There are several image editing software packages available, and some cameras come with them. You can use these programs to manipulate, crop, combine and print your digital photos. There are no limits to what you can accomplish with this software, from a subtle contrast adjustment to elaborate works of art incorporating multiple images, textures and treatments. A few basic procedures will enhance digital photos and help fix problem areas:

  • Once you start editing a digital photo, save the result as a separate file. You always want to have your original image available in an unedited form.
  • Adjust contrast and color levels. Giving the contrast setting a nudge can really enhance a photograph and create a more dramatic look. If a photo looks washed out, increasing saturation levels can make the colors more vibrant. In cases where an incorrect white balance on the camera has given the image a colored tint, adjusting the color levels can bring the photo back to a realistic, untinted state. This image was too dark after we took it. But we used Adobe Photoshop, a popular brand of photo editing software, to adjust the brightness and contrast.
  • Rotate, crop and matte photos. Photo editing software makes it simple to rotate a photo (90 degrees if you took the picture with the camera turned to the side, or smaller amounts if the horizon is just slightly out of line). You can also easily crop off unwanted portions of a photo, making it possible to recompose a shot long after you took it. Most programs allow you to add a frame around the picture, making a built-in matte.
  • Get rid of red-eye. Some programs have a "red-eye removal" function built in. You can also do it manually by selecting the subject's eyes and altering the color balance to reduce redness. More advanced users can change the entire color palette of an image, create a sepia or monochrome image, or make an image black and white.
  • Remove unwanted objects. You can use certain tools in a photo-editing program to remove parts of a photo, leaving what appears to be the plain background in its place. Say you've taken a photo of a centuries-old castle, but someone had parked a mini-van in front of it, ruining the mood of the scene. Though it will take some practice, you don't have to be a photo-editing expert to completely remove the van and leave just the castle behind it. With photo editing software you can manipulate images in many different ways, like turning our motorcycle picture into a charcoal sketch.
  • Create works of art. Filters and plug-ins included with many programs allow you to change photos into artistic pieces with a few mouse clicks. Change can be drastic or subtle, such as making a photo of your back yard look like a watercolor painted by an Impressionist master, or changing a photo of your motorcycle into a charcoal sketch.

By now you should have a good idea of what to look for in a digital camera and how to use it to get the images that you want. Above all, digital photography should be a fun experience. Feel free to experiment with settings and editing software to create your own works of art.

Advertisement

For lots more information on digital photography, cameras and more, check out the links on the next page.

Advertisement

Lots More Information

Related Articles

More Great Links

  • "Advanced Digital Camera Settings." DigicamHelp, 2006. http://www.digicamhelp.com/advanced-digital-camera-settings/index.htm
  • Johnson, Dave. "How to Do Everything with Your Digital Camera." Osborne/McGraw-Hill; 1st edition, February 26, 2001. ISBN 0072127724.
  • Johnson, Dave. "I Just Bought a Digital Camera, Now What?! "Silver Lining; 1st edition, September 10, 2001. ISBN 0760726566.
  • Milburn, Ken and Rockwell, Ron. "Digital Photography Bible." Wiley; 2nd edition, September 6, 2002, ISBN 0764549510.

Advertisement

Loading...