How to Use Photo Editing Software to Remove Red Eye

We wouldn't dream of editing out your red eyes, buddy.
iStockphoto/Thinkstock

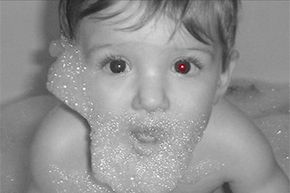
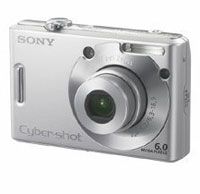
If you're a fruit fly, then red eyes look pretty awesome. But if you're a human (and haven't been bitten by a vampire or possessed by a demon recently), then red eyes can be a bit unsettling. Unfortunately, most point-and-shoot cameras produce the dreaded red-eye effect when they're used to snap portraits in low light.

A quick anatomy lesson can help you understand why it happens. Let's say you're photographing your sister Molly at a Saturday-night party. In a dark room, the pupils of Molly's eyes open up to let more light in, which helps her see better. When the camera flashes, her eyes react, but her pupils can't contract quickly enough to beat the sudden, intense illumination. Some of that light (the same light that reveals your sister's goofy smile) passes through her pupils and strikes the part of her eyes called the choroid at the back. The choroid comes equipped with a generous supply of blood vessels, which help nourish the retina. When light strikes the reddish tissue, all wavelengths get absorbed except red, which gets reflected. The reflected red light emerges from Molly's eyes and comes straight back to your camera, transforming your sister into Beelzebub. Nice shootin,' Tex.

Advertisement

Some cameras try to reduce red-eye by triggering a double flash. The first flash causes the subject's pupils to contract before the second, image-producing flash fires. If your camera doesn't come with this feature, you can still reduce the red-eye effect by adopting a few simple techniques. For example, some point-and-shoots allow you to dial down the flash intensity by one or two increments. You can also turn on some lamps in the room where you're shooting. In the ambient light, your subject's eyes won't react as strongly to the flash. Finally, try shooting your subject from the side. This prevents the red-shifted light from bouncing straight back to your camera lens.

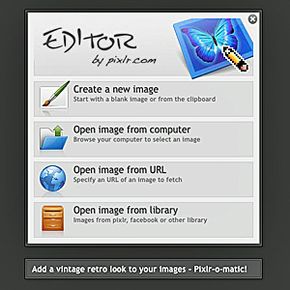
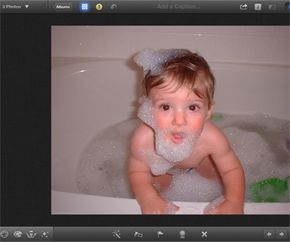
Even with all of those precautions, you'll eventually produce a photo in which the subject's eyes glow like a fireplace ember. Luckily, there's still hope for these marred masterpieces, and it comes in the form of photo editing software. Just like cameras, apps that allow you to manipulate, enhance and tweak images in your digital library can vary significantly in features and price. Adobe Photoshop, the mainstay in the category, can run you $600 or more for a non-upgrade, non-educational license. And it will require a decked-out Mac or PC to run it efficiently. Lower-cost alternatives do exist, including apps that will run on your smartphone or tablet. They won't deliver everything that Photoshop does, but they can help you tackle your red-eye issues in, well, the blink of an eye.

Advertisement

How to Remove Red-eye Using Photoshop

Demonic child in bathtub, or just another case of red-eye?
Photo courtesy William Harris
With red-eye removal, demonic child turns angelic.
Photo courtesy William Harris

Adobe Photoshop has been around since 1990, so it's one of the industry's most venerable products. It also can present a steep learning curve to someone with no experience using photo editing software. Luckily, the engineers at Adobe have streamlined certain functions and activities to make life easier for amateur photographers. Red-eye removal is one of those activities.

It all begins with the red-eye tool, which Adobe introduced with Photoshop CS2 (CS stands for Creative Suite). We're using CS5 for this tutorial, but the basic process should be the same for any version of the software. Here's how it works.

Advertisement

First, from within Photoshop, open the file that needs editing. For this tutorial, make sure the subject in the photo has feral eyes, like the one pictured. Before you do anything else, duplicate your original layer (Layer > Duplicate Layer) so you're working on a copy of the image. If you need to, increase the zoom level so you can get a really good look at the eyes.

Next, from the tools palette, select the red-eye tool, which is arranged with the other healing tools, such as the spot healing tool, the healing brush tool and the patch tool. It literally looks like a red-eye, and if you mouse over it, it should say "RedEye Removal Tool" or something similar. Notice that the red-eye tool comes with its own specific controls -- one for pupil size and one for darken amount. The default setting is 50 percent for both controls. We're going to use the default settings at first to see what kind of results we get.

Once you select the red-eye tool, the normal cursor will be joined by an eyeball icon. Using the mouse, move the eyeball cursor into your photo and click and drag a box (or marquee) around one of the red eyes. Make sure your box extends far beyond the eye itself. As soon as you've drawn a box around the eye, unclick. Now do the same on the other eye. Each time you marquee around an eye, you should see the red pupil darken automatically. In the second example photo, we've used the red-eye tool on both eyes, and the results are pretty good.

Sometimes, the red-eye tool doesn't correct the entire pupil. In that case, you may need to fiddle with the pupil size value until you get satisfactory results, perhaps even upping it to its maximum of 100 percent.

Hold on a sec though. We have a few more Photoshop tricks up our sleeve next.

Advertisement

More Red-eye Photoshop Tricks: Black-and-White Adjustment Layers

One of the steps in the process of removing red-eye with Photoshop's black-and-white adjustment layers
Photo courtesy William Harris
You can see the finished result of red-eye removal on one eye, using Photoshop's black-and-white adjustment layers.
Photo courtesy William Harris

Some Photoshop experts and photo restoration aficionados scoff at the red-eye tool, pointing to corrected photos in which the subject's pupils look too dark and glassy. This can be a valid argument, especially if the subject has light-colored irises. Luckily, there's another Photoshop technique -- using a black-and-white adjustment layer -- that may provide more realistic red-eye correction. Here's how you do it.

Again, you have to select a photo to edit. We're going with that same bathtub shot. Next, create a black-and-white adjustment layer (Layer > New Adjustment Layer > Black & White). When you do, you'll see the layer palette change accordingly. The adjustments palette will also update with options specific to your new layer choice. And, of course, your image will appear to lose its color.

Advertisement

Now, increase the zoom level so you can get a good look at your subject's eyes. In the tools palette, select the brush tool and make sure the hardness -- one of the brush tool's settings -- is set to 100 percent. Also, make sure your foreground color is set to black.

When the brush tool is selected, the cursor changes to an open circle, which you can adjust using the bracket keys. The open bracket decreases the brush size; the close bracket increases the brush size. With the cursor situated over one of the pupils of your image, increase or decrease the brush size so the open circle just fits around the pupil. Click once on the pupil. When you do, you should reveal the red pupil in your black-and-white layer (see first photo).

Now you want to invert the layer mask you created (Image > Adjustments > Invert), which restores the original image color except for the black-and-white adjustment you made over the pupil. If you didn't quite eliminate all of the red, switch your background and foreground (at the bottom of the tools palette) and paint over any remaining red pixels with your brush tool. Then, on the adjustments palette, experiment with different black-and-white filters to change the intensity of the pupil color. On our image, we're going to use the Maximum Black setting. Finally, you'll want to add a slight blur (Filter > Blur > Gaussian Blur) to soften the edges of the pupil. You won't need much -- maybe a radius of 1.0 to 1.5 pixels. When you're done, you should have something like the second photo.

Many people like this technique better than the built-in red-eye tool, because they feel it gives a bit more control over the editing process. If the idea of having control appeals to you, but you don't want to pay for Photoshop, you still have options. Keep reading to see how Pixlr, a free Web-based image editor, can remove red-eye as effectively as its expensive cousin.

Advertisement

How to Remove Red-eye Using Pixlr

One of the first menus you'll see when you start playing with Pixlr
Screenshot by HowStuffWorks.com
Our results after using Pixlr's red-eye reduction tool
Photo courtesy William Harris
Our results (on one eye) after fiddling with Pixlr's adjustment settings
Photo courtesy William Harris

Swedish developers launched Pixlr in 2008 to provide nonprofessionals an easy -- and free -- tool to create, edit and share images online. In 2011, Autodesk, a maker of 3-D design software (and the brains behind SketchBook Pro), acquired Pixlr and added a few new features. The image editor remains free and attracts millions of users who want the power of Photoshop and Photoshop Elements without the accompanying price tag.

To remove red-eye using Pixlr, navigate to www.pixlr.com in your favorite browser. Then, click on the Pixlr Editor link at the top of the page. You'll get the first screen pictured.

Advertisement

Click on "Open image from computer" and then browse your image library for the photo you want to edit. The first thing you'll notice is that Pixlr, like Photoshop, comes with a prebuilt red-eye tool. When you select the red-eye tool, you get one control -- for tolerance, which can be adjusted between 0 and 100 percent.

The default setting is 50 percent, and you can start with that to see if you like the results. Once you've set the tolerance level, simply click in the middle of each red pupil, and the adjustment will be made automatically. On our photo, we found that the lower the tolerance, the better the results. The second image was created with the tolerance set to zero.

The results were OK, but you may be able to eliminate red-eye more effectively by using Pixlr's adjustment settings. Here's how to do it. First, open the image you want to edit and zoom in so the eyes are front and center. Next, select the marquee tool, which looks like a dashed box, in the main tool palette. Now select the elliptical marquee option and set the constraint to "Aspect ratio" so you can draw a perfect circle.

Move into your image and draw a circle the same size as the subject's pupil. Make sure the marquee is centered over the pupil and then go to Edit > Copy, and then Edit > Paste. You'll end up with a new red pupil on the subject's face (should have three now).

Using Pixlr's move tool, grab the cutout pupil and place it back where it started, above the original red pupil. Then hide the original (bottom) layer so all you see is the cutout pupil.

Next, go to Adjustment > Desaturate, which removes the color, leaving behind a grayscale version of the pupil. Then go to Filter > Gaussian Blur and set the blur amount to 10. Finally, click on the original layer to make it visible again. When you do, the red pupil should be removed from one eye. You can simply duplicate the process on the other eye.

Advertisement

How to Remove Red-eye Using a Tablet or Smartphone App

A screen akin to what you'll see when you first start editing photos in iPhoto for iOS
Screenshot courtesy William Harris
Our red-eye results after editing photos in iPhoto for iOS
Photo courtesy William Harris

These days, most people take a significant number of photos on their smartphones and tablets. It makes sense, then, to edit on the mobile device instead of trying to shuttle photos to your PC and back again. Owners of iPhones and iPads have a great solution with iPhoto for iOS, which Apple released in 2012 with the release of the new iPad. And the really good news -- you could get it from the App Store for just $4.99 (when we wrote this in 2012).

You won't get desktop-quality functionality with iPhoto for iOS, but you can do some simple editing, including red-eye removal. Let's start with the iPad.

Advertisement

First, you need to open the image you want to edit. You can beam photos from your iPhone to the iPad or open images from your photo stream or camera roll.

In iPhoto for iOS, the red-eye tool comes bundled with other brushes, indicated by the appropriate icon in the lower left. When you touch the icon, all of the available brushes magically fan out before your eyes. The red-eye brush is first in line, after the quick repair brush (it's labeled as such, too).

Next, you select the red-eye brush and then tap into one of the pupils. You'll hear a cute sound effect, and then you'll see the pupil darken automatically. There are no additional controls -- you're at the mercy of the tool's prebuilt, default settings. All that's left is to tap the other pupil and then decide if you like the correction. If not, you can undo the red-eye removal, but you can't fine-tune pupil size or the darkness amount. You'll see our results in the second photo pictured.

The subject's right eye seemed fine, but the left eye was far less satisfactory. The pupil seemed too dark and just a little too big. Still, the correction is probably adequate for a quick post to Facebook or a text message to Grandma. And it's still better than the red-eyes themselves, which can make even the cutest babies look like visitors from the underworld.

Advertisement

Author's Note

I've been using quick-fix red-eye tools -- both in iPhoto and in Photoshop products -- for years without really worrying about their overall artistic excellence. As I researched this article, I came to realize two things: First, there are dozens of techniques to combat the red-eye effect, and second, people feel quite passionately about their unique approach. My goal in this article was to show a few of the easier techniques so that amateur photographers (like myself) could clean up their images without necessarily investing huge amounts of time or money.

Related Articles

Sources

  • Autodesk. "Autodesk Acquires Pixlr." Autodesk Investor Relations. July 19, 2011. (June 13, 2012) http://investors.autodesk.com/phoenix.zhtml?c=117861&p=irol-newsArticle&ID=1586381&highlight=
  • Scott, Preston. "The Science Behind the Red-eye Effect." Camera Technica. Mar. 14, 2011. (June 13, 2012) http://www.cameratechnica.com/2011/03/14/the-science-behind-the-red-eye-effect/
  • Smith, Janine. "Photo Restoration with Photoshop." Photoshop CS4 Tutorials. Lynda.com. Oct. 13, 2011. (June 13, 2012)
  • Yang, Bryan. "What Causes the Red Eye Effect?" Yale Scientific. May 12, 2011. (Jun. 13, 2012) http://www.yalescientific.org/2011/05/what-causes-the-red-eye-effect/

Advertisement

Advertisement

Loading...