10 Important Photography Terms

Whether you're using a standard point-and-click camera or a state-of-the-art digital one, you need to know the proper photography terms to capture that perfect image. See more pictures of cool camera stuff.
Brand X Productions/Getty Images

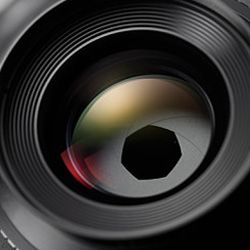
French inventors Nicéphore Niépce and Louis Daguerre conceived photography in the 19th century as a way to record light by shining it on photosensitive chemical screens. In the 21st century, most photographs are taken with digital cameras, which use sensors instead of chemicals to record images and save them as digital files. Even the most modestly priced digital cameras can take decent photos today, so high-quality photography is within the reach of almost everyone.

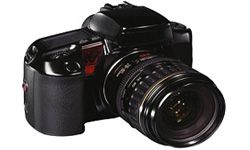
Even the best camera needs a good photographer behind it to take the best possible images. You might be a budding photo pro, an ardent hobbyist, or just someone who wants to take great photos at family gatherings and summer vacations. In any case, it pays to know the core fundamentals of photography. While cameras have certainly changed a lot in the last 150 years, the principles of photography remain pretty much the same.

Advertisement

Put a fresh set of batteries into your digital camera, make sure the lens cap is off and prepare for 10 photography terms that will help you take better photos in any situation.

10: Exposure

Exposure simply refers to the amount of light recorded on the film or sensor. You want the right amount of exposure to capture the image you see (or are trying to create). If you shoot a daylight scene with too much light hitting an overly high ISO sensor for too long, you'll end up with an overly bright, glaring, unrealistic image. On the other hand, a small aperture at low ISO and short shutter speed could make a daylight scene look dark and murky. Balancing shutter speed, ISO and aperture to get the correct exposure is the key to great photography. Master this juggling act and you'll be well on your way to consistently taking great photos. (And if you have no idea what any of this means, we'll explain each of these terms later in this article.)

Luckily, there's an easy way to cheat on your exposure juggling routine. It's called bracketing. To bracket a photo manually, set your shutter speed, aperture and ISO to where you think the proper exposure is, then take the photo. Then, adjust your aperture or shutter speed to reduce the exposure slightly and take that photo. Then adjust the exposure so it's slightly more than the first photo and take that one. This series of three photos "brackets" what is, hopefully, the proper exposure. Try to hit the sweet spot between the three to capture the perfect image.

Advertisement

Most digital cameras make this even easier with an automatic bracketing mode. When this is turned on via the camera's settings, the camera will automatically take three photos, with properly adjusted exposure settings, every time you press the button.

9: Aperture/f-stop

That opening you see in the lens actually has a name -- and it's more important than you think.
Pete Gardner/Getty Images

Aperture and f-stop are closely related terms. Aperture refers to the opening in the lens that light shines through when a photo is taken. A larger aperture obviously lets more light through. F-stop is simply the nomenclature that photographers use when discussing different sizes of aperture.

F-stops are usually given as "f/8" or "f/22." The numbers can range from less than one (only a few lenses and cameras are capable of f/0.95, for instance) to f/128. A higher f-stop indicates a smaller aperture and less light getting through. Usually, f-stops are indicated on a standard scale in which each increase represents an aperture that allows half as much light to get through. For example, f/8 allows half as much light through as f/5.6. While many cameras allow for f-stops that lie in between these standard f-stop settings, the standard scale looks like this:

Advertisement

f/1, f/1.4, f/2, f/2.8, f/4, f/5.6, f/8, f/11, f/16, f/22, f/32, f/45, f/64, f/90, f/128

Aperture is extremely important because photography is all about the manipulation of light. The proper f-stop for the lighting conditions is a major factor in the quality of the final photograph. It's hard to give specific rules for f-stop settings, because the right setting depends on a bunch of other factors, like the lens you're using, the shutter speed at which you're shooting, and the subject you're photographing. It will take some experimentation and experience with your particular camera setup to find the aperture settings that work best for you.

F-stops also allow photographers to manipulate depth of field to create different artistic effects in their photos. We'll discuss depth of field in detail later, but for now, note that a larger aperture (which has a smaller f-stop number) will give you a narrow depth of field, while smaller apertures (with larger f-stop numbers) will result in a large depth of field.

8: Flash

Flash can be an important light source when shooting in low-light areas or unevenly lit situations. However, even if you only shoot photos at family gatherings with an inexpensive point-and-shoot camera, you've probably already come to realize the limitations of the flash as a primary light source. Countless photos with the foreground subjects "blown out" by excessive flash and overexposure litter hard drives everywhere, leading many photographers to try and work with as much ambient light as possible. All that said,your camera's flash doesn't have to be your enemy.

If you're stuck with your camera's built-in flash and no good way to increase lighting, there are a couple of tricks for preventing flash-induced "blow out." First, back away from the subject, zooming in slightly if necessary. Try taping some white tissue paper over the flash to diffuse and soften it. Many digital cameras allow you to reduce the flash intensity through the settings menu, so try that, too. If all else fails, just stick your finger over the flash. This is a hit-or-miss method, and the photo will be dark, but if you experiment, you might capture the ambiance you're looking for.

Advertisement

Of course, professional photographers can play a variety of tricks with flash, from using remote flash, bouncing the flash off a reflective surface, or using a flash in the middle of a long exposure to freeze the action. It's a very versatile lighting tool.

7: Depth of field

This photo beautifully demonstrates a camera's limited depth of field.
Newton Daly/Getty Images

You've probably seen beautiful photos of flowers which are close to the camera and in crisp focus, while the background is soft and fuzzy. That is the result of a camera's limited depth of field. Depth of field can range from extremely narrow (for example, a photo of a flower in which only one petal is in focus while the rest is out of focus) to effectively infinite (such as landscape photos where everything in the image is in crisp focus).

Depth of field is primarily affected by the camera's aperture setting. As we explained above, a larger aperture (which has a smaller f-stop number) will give you a narrow depth of field, while smaller apertures (with larger f-stop numbers) will result in a large depth of field. Depth of field is also strongly affected by focal distance, which reflects both the kind of lens you're using and how close the subject is to the camera. Closer subjects will have narrower depth of field, while distant subjects can have nearly infinite depth of field. Calculating depth of field is actually a complicated business involving something called the Circle of Confusion. If you're not interested in the math, just experiment with your camera and a variety of f-stop settings and subjects to see how you can manipulate depth of field.

Advertisement

6: Focus

Focus is a function of a camera's lens and the current aperture setting. An object that is in focus in crisp and clear, while one that is out of focus will appear blurry. Photographers have many ways to manipulate and adjust focus. Some prefer to manually focus a shot using the focus ring. Point-and-shoot camera users often rely on autofocus, which is a system that lets a camera's sensors detect the subject's distance as a motor automatically adjusts the focus. Autofocus is very handy, but has its limits if you're shooting several subjects at various distances from the camera, or subjects that are moving toward or away from the camera.

Some advanced cameras have continuous autofocus -- it can actually track moving subjects and keep them in focus no matter where they go. If one of these cameras isn't in your budget, you can manually set your focus for a certain distance and time your photos when the subject reaches the right place. You can even "game" the autofocus by forcing it to focus on some object at the proper distance, then taking the actual photo of an entirely different subject that moves into that same distance.

Advertisement

5: ISO Number

If you look at the second button from the right just above the display screen on this camera, you'll find its ISO setting.
Creative Crop/Getty Images

The ISO number is a measure of light sensitivity. It originally referred to the sensitivity of a given type of film, and the standards for measuring were determined by the International Standards Organization (ISO), which is where the name comes from. In a film camera, you had to change film to change ISO. Digital cameras allow you to change ISO through the camera's menu functions, adjusting the sensitivity of the camera's sensor to an ISO equivalent number.

So how does ISO work? While it measures light sensitivity, photographers refer to ISO as the "speed" of the film or sensor. At high sensitivity, more light is sensed within a given period of time than at low sensitivity, so high sensitivity is considered faster. Unlike aperture, ISO settings are relatively straightforward. Low ISO numbers indicate the least amount of light sensitivity, while high ISO numbers are faster, more sensitive settings.

Advertisement

Why not always use the highest ISO possible all the time? In film cameras, high ISO film was grainy. We didn't escape that limitation with digital cameras, but instead of grain, high ISO numbers introduce digital noise. One of the most important things a photographer can learn is how to get the best quality shot in a given lighting condition with the lowest possible ISO setting. Of course, sporting events and other fast moving action requires high, fast ISO numbers. Fortunately, those situations are usually brightly lit.

4: Lens

The lens is probably the most important part of the camera. Photography is all about capturing light, and all the light you capture passes through the lens. On less expensive cameras, the lens is built into the camera's body. Single lens reflex (SLR) cameras have interchangeable lenses. The camera body has a metal ring where the lens attaches. The attachment point also has electronic connection points so the camera can control the focus and zoom motors on the lens.

An important factor in choosing a lens is focus length. This generally refers to the length of the lens itself, and is measured in millimeters. A 50 mm lens is considered average, good for shooting subjects that are 33 to 65 feet (10 to 20 meters) from the camera. Wide angle lenses have shorter focal lengths that can capture large panoramic scenes or large subjects that are relatively close to you. Telephoto lenses, which can have focal lengths of hundreds of millimeters, are basically telescopes mounted to a camera. They make far away subjects seem closer, but with a limited field of view.

Advertisement

If your camera has a zoom lens, then the focal length changes as you zoom in and out. Remember to never use digital zoom -- the camera is simply enlarging the pixels to make the subject seem closer, which reduces image quality.

3: Shutter Speed

This image shows how photographers can use shutter speed to great effect.
Lisa Stirling/Getty Images

So far we've talked about aperture, which defines how much light gets through, and ISO number, which determines the light sensitivity of the camera's sensor. Shutter speed is the third part of the exposure equation. It refers to how long the shutter remains open to allow light through. Shutter speeds are given in fractions of a second -- you'll commonly shoot at 1/500.

Shutter speed is tricky because slow shutter speeds don't just allow more light through, they can cause blurring. The entire time the shutter is open, light is hitting the sensor, and if an object (or the camera itself) moves during that time, the movement will show up as a blur. If you've ever seen one of those photographs of the stars at night showing the lines of their motion as the Earth rotates, that image was the result of a very long shutter speed recording the starlight over several hours.

Advertisement

You can reduce blur by using a tripod to hold the camera steady when you shoot, which lets you use slower shutter speeds, but if you're shooting sports and you don't want blurry players, that only helps so much.

2: White balance

White balance reveals an interesting difference between a camera and a human eye: A human eye has a human brain attached. When you look at a white object, your brain is actually interpreting the lighting cues around you and calculating that the object is white on the fly. If the object is under a blue light, it will really look blue, but your brain compensates for the color difference, so you'll see it as white. The camera does no such compensating unless you force it to do so, so if a white object is under a bluish light, the camera will record bluish pixels.

Adjusting white balance helps force the camera to compensate for the fact that most lighting conditions aren't perfectly white. Many indoor lights have a yellowish tinge to them, while fluorescent lights have a bluish tint. Even natural light is a little bluer than you might think. You can set white balance manually by adjusting it up or down or selecting the appropriate setting, then taking some test shots to see which ones look most natural.

Advertisement

Alternately, you can use a camera's automatic white balance function. Just aim the camera at a white object, such as a large sheet of paper (this is why news vans are almost always white -- so the camera operator has an easy way to set white balance). When you hit the white balance button, the camera will automatically adjust to the lightning conditions.

1: Post processing

As you can see here, a few adjustments in photo editing software can improve a poorly exposed image.
Ed Grabianowski/HSW

With digital photos, your work doesn't end when the photo is taken. While Photoshop is the most famous photo processing software package, there are dozens more can be used to alter and manipulate photos. With practice, you can use them for a lot more than pasting photos of your little sister's face onto zoo animals.

Beginners can use post processing to adjust brightness, contrast and color balance. This is an easy way to make a poor photo passable and make a good photo look great. More advanced users can play with color channels, apply special effects or make a composite of multiple photos. For example, if you were bracketing a shot of a dog in front of a window, you might get one photo with the dog properly exposed but the window too bright, and one with the window exposed but the dog too dark. In post processing, you could combine the two for one perfectly exposed image.

While there's no limit to the creative things you can do with post processing software, there's a reason this term is last on the list. Learn to shoot excellent photos with the camera first. Then you'll have the raw materials to do good post processing work later.

Lots More Information

Related Articles

  • 10 Tips for Getting the Most From Your Digital Camera
  • 10 Fall Photography Tips
  • 5 Black-and-white Photography Tips
  • 5 Portrait Photography Tips

  • Rowse, Darren. "ISO Settings in Digital Photography." Digital-Photography-School.com. (Accessed Dec. 8, 2010.)http://www.digital-photography-school.com/iso-settings
  • Photonhead. "Controlling Exposure." (Dec. 7, 2010.)http://www.photonhead.com/beginners/shutterandaperture.php
  • Goyer, Hideo. "A Beginner's Guide to Simple Photography Concepts: ISO, Aperture, and Shutter Speed." DPChallenge.com. (Dec. 9, 2010.)http://www.dpchallenge.com/tutorial.php?TUTORIAL_ID=45
  • Guy, NK. "Canon EOS Beginners' FAQ." Photonotes.com. (Dec. 8, 2010.)http://photonotes.org/articles/beginner-faq/lenses.html

Advertisement

Loading...